Professional asphalt removal starts with a thorough site assessment to evaluate the area’s size, pavement thickness, and potential obstacles. You’ll need to clear the work area, mark underground utilities, and notify neighbors about the upcoming project. Expect contractors to use specialized equipment like hydraulic breakers and skid steers while following proper disposal protocols. Proper preparation guarantees your project’s success and helps you understand the key steps ahead.
Key Takeaways
- Schedule a professional assessment to evaluate the site, discuss removal methods, and receive an accurate cost estimate.
- Clear the work area of vehicles, mark underground utilities, and document existing property conditions before work begins.
- Expect contractors to use specialized equipment like hydraulic breakers, excavators, and skid steers for efficient removal.
- Prepare for noise, dust, and temporary access restrictions during the removal process.
- Ensure your contractor has proper disposal permits and follows local recycling requirements for asphalt waste.
Initial Site Assessment and Project Planning
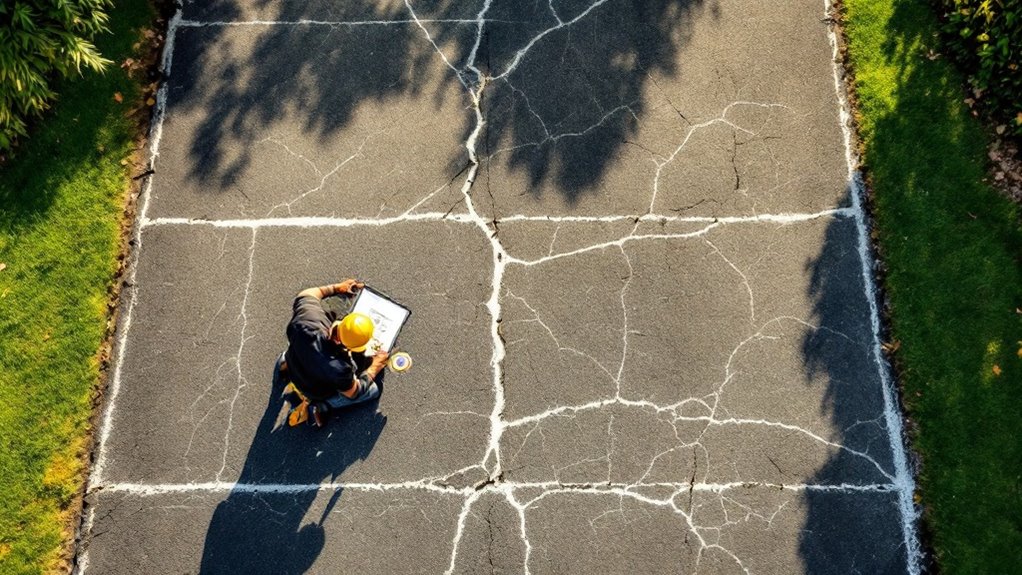
Before beginning any asphalt removal project, a thorough site assessment helps determine the scope, timeline, and necessary equipment. You’ll work with professionals who’ll evaluate the size of your area, measure the asphalt’s thickness, and identify any potential obstacles like utilities or drainage systems.
During this phase, you’ll discuss your goals and timeline with the contractor. They’ll explain the removal process, recommend disposal methods, and outline any preparations you’ll need to make. Together, you’ll create a detailed plan that includes traffic management if needed, equipment staging areas, and environmental considerations.
Your contractor will also assess whether full removal or partial milling is more suitable for your situation, and provide you with an exhaustive cost estimate based on these findings.
Specialized equipment will be selected to ensure proper handling of heavy materials while protecting your property’s surfaces during the removal process.
Preparing Your Property for Asphalt Removal
Once you’ve finalized your asphalt removal plan, proper site preparation will guarantee a smooth and efficient project. Start by removing all vehicles, equipment, and portable items from the work area and nearby spaces. You’ll need to mark underground utilities and irrigation systems to prevent damage during removal.
Clear vegetation and debris from the edges of the asphalt, and confirm there’s adequate access for heavy equipment. If you’re in a residential area, notify your neighbors about the upcoming work and expected noise levels. Consider temporary fencing or barriers to keep children and pets safe during the removal process.
Remember to document the current condition of surrounding structures, including photos of adjacent walls, fences, and landscaping. This will protect both you and the contractor if questions arise about property damage later.
Professional Equipment and Methods Used
Professional asphalt removal demands specialized equipment designed for efficient material extraction and processing. You’ll see contractors using heavy-duty machinery like hydraulic breakers, skid steers with milling attachments, and excavators equipped with specialized buckets. These tools make quick work of even the toughest pavement.
Your contractor will likely employ one of three main removal methods: breaking, milling, or saw cutting. Breaking involves using percussion tools to fragment the asphalt into manageable pieces. Milling machines grind the surface layer by layer, while saw cutting creates clean edges for precise removal sections. They’ll also bring dump trucks and loading equipment to haul away the debris, ensuring your property stays clean throughout the process. Modern equipment includes dust suppression systems to protect your air quality during removal.
The Step-by-Step Removal Process
You’ll need specialized tools like jackhammers, saws, and excavators to break up the old asphalt into manageable sections.
Professional removal equipment, including skid steers and front-end loaders, will then lift and transport the broken pavement pieces to waiting dump trucks.
Finally, your crew will clear the remaining debris and prepare the site for new construction or landscaping.
Breaking Up Old Pavement
Breaking up old pavement requires careful planning and the right equipment before demolition begins. You’ll need to determine whether your project calls for hydraulic breakers, jackhammers, or heavy machinery like excavators with specialized attachments. The size and thickness of your asphalt surface will dictate which tools are most effective.
Once you’ve selected your equipment, you’ll start by creating initial breakpoints around the perimeter of the area. Working in manageable sections helps prevent uncontrolled cracking and makes debris removal more efficient. As you break up the pavement, you’ll notice it separates into chunks that are easier to handle. Remember to keep the broken pieces at a reasonable size for hauling – typically no larger than 2-3 feet across. This methodical approach guarantees a smooth removal process.
Equipment and Tools Required
The proper tools and equipment make all the difference in successful asphalt removal. You’ll need heavy-duty machinery like jackhammers, skid steers with specialized attachments, and excavators to break up and remove large sections efficiently.
For smaller jobs, you can rely on pneumatic breakers, circular saws, and pry bars.
Safety equipment is essential for your team, including hard hats, steel-toed boots, safety glasses, and respiratory protection to guard against dust and debris. You’ll also want to have a dump truck on standby to haul away the removed material.
Don’t forget to mark paint and measuring tools to outline the work area, plus traffic cones and barriers if you’re working near roadways. Guaranteeing the right equipment will enable you to complete the job safely and effectively.
Hauling and Site Cleanup
Proper cleanup marks the critical final phase of asphalt removal. Once your contractor has broken up and removed the old asphalt, they’ll need to handle the debris responsibly and restore your site to a clean condition. You’ll want to guarantee your service provider follows industry standards for waste management and site restoration.
- Load broken asphalt pieces into dump trucks using heavy equipment like front-end loaders or excavators
- Transport debris to approved recycling facilities or disposal sites that accept construction materials
- Grade and level the exposed surface to prepare for new installation or landscaping
- Sweep and clear surrounding areas of any remaining debris, dust, or small particles
Your contractor should leave your property looking neat and ready for its next phase, whether that’s new pavement installation or alternative ground coverage.
Disposal and Environmental Considerations
Responsible disposal of removed asphalt requires careful attention to local regulations and environmental guidelines. You’ll need to confirm your contractor follows proper recycling protocols and disposes of materials at approved facilities. Most asphalt can be recycled into new paving materials, reducing environmental impact and landfill waste.
You’ll want to verify that your contractor has the necessary permits and documentation for waste disposal. They should provide you with records showing where the materials were taken. Many municipalities now require a certain percentage of construction waste to be recycled, so you’re helping meet these sustainability goals when you choose recycling options. Additionally, proper disposal helps you avoid potential fines and guarantees you’re contributing to your community’s environmental efforts.
Post-Removal Site Preparation Options
After removing your old asphalt, you’ll need to assess the exposed ground through proper grading and soil testing to guarantee a stable foundation for your next project.
You’ll want to evaluate soil composition, drainage patterns, and compaction levels to determine if additional modifications are necessary. Based on these test results, you can select the appropriate base materials, such as crushed stone or recycled concrete aggregate, that will provide ideal support for your new surface.
Grading and Soil Testing
Once asphalt removal is complete, your site requires thorough grading and soil testing to guarantee a stable foundation for future use. You’ll need professional evaluation to determine soil composition, drainage patterns, and potential contamination from years of asphalt exposure. This pivotal step verifies your property meets local regulations and maintains long-term stability.
Soil composition testing reveals mineral content, pH levels, and organic matter percentages. Compaction tests determine the soil’s load-bearing capacity for new construction. Drainage assessment identifies potential water flow issues and necessary grade adjustments. Environmental screening detects any hazardous materials requiring remediation.
Working with certified soil analysts and grading experts will help you make informed decisions about your site’s future use. They’ll provide detailed reports and recommendations tailored to your specific property needs, ensuring a seamless shift to your next project.
Base Material Selection
Selecting the right base material for your site’s foundation is essential after asphalt removal. You’ll want to choose between crushed stone, recycled concrete aggregate (RCA), or gravel, depending on your specific needs. Each option offers unique benefits for your project’s success.
Crushed stone provides excellent drainage and compaction properties, making it ideal for areas with heavy traffic. If you’re environmentally conscious, RCA is your best choice – it’s both cost-effective and sustainable.
Gravel works well for lighter applications and temporary surfaces. Consider your local climate when making your selection. Areas with frequent rainfall need materials with superior drainage capabilities, while regions with extreme temperature fluctuations require base materials that can withstand freeze-thaw cycles without compromising structural integrity.
Frequently Asked Questions
How Long Does the Asphalt Need to Dry Before Driving on It?
You’ll need to wait 24-48 hours before driving on newly laid asphalt, but during hot weather, you might want to wait up to 72 hours for complete curing and maximum durability.
Will Asphalt Removal Affect My Underground Sprinkler System?
Your sprinkler system might be damaged during asphalt removal if it’s close to the surface. Let your contractor know about your irrigation system so they’ll work carefully around those areas.
Can Asphalt Removal Be Done During Winter Months?
You can have asphalt removal done in winter, though it’s not ideal. Cold temperatures make the material harder to break up, and frozen ground conditions could increase your project’s time and cost.
What Happens if It Rains During the Removal Process?
Rain can halt your asphalt removal since wet conditions make the process unsafe and ineffective. You’ll need to wait until the area dries completely before work can resume.
Are Permits Required for Residential Asphalt Removal in My Area?
You’ll need to check with your local building department since permit requirements vary by city. Most residential areas require permits for projects affecting driveways or significant surface changes.
Conclusion
Now that you’ve learned what to expect during asphalt removal, you’re better prepared to tackle your project. Remember to get multiple quotes, check contractor credentials, and communicate your post-removal plans. By following proper preparation steps and understanding the process, you’ll guarantee a smoother experience. Don’t forget to take into account environmental regulations and disposal options when planning your asphalt removal project.